How to Draw Saturn Step by Step
In our solar system, there are eight planets, (nine if you include Pluto,) and each one is very different from the last.
Saturn is one of the most unique of them all, as it is not only the second-largest but also has a huge ring surrounding it.
This has generated a lot of intrigue around this planet, and the visual distinction means that many like to learn how to draw Saturn.
By the end of this guide, you will know how to do it yourself!
This step-by-step guide on how to draw Saturn will have you recreating this gas giant in no time.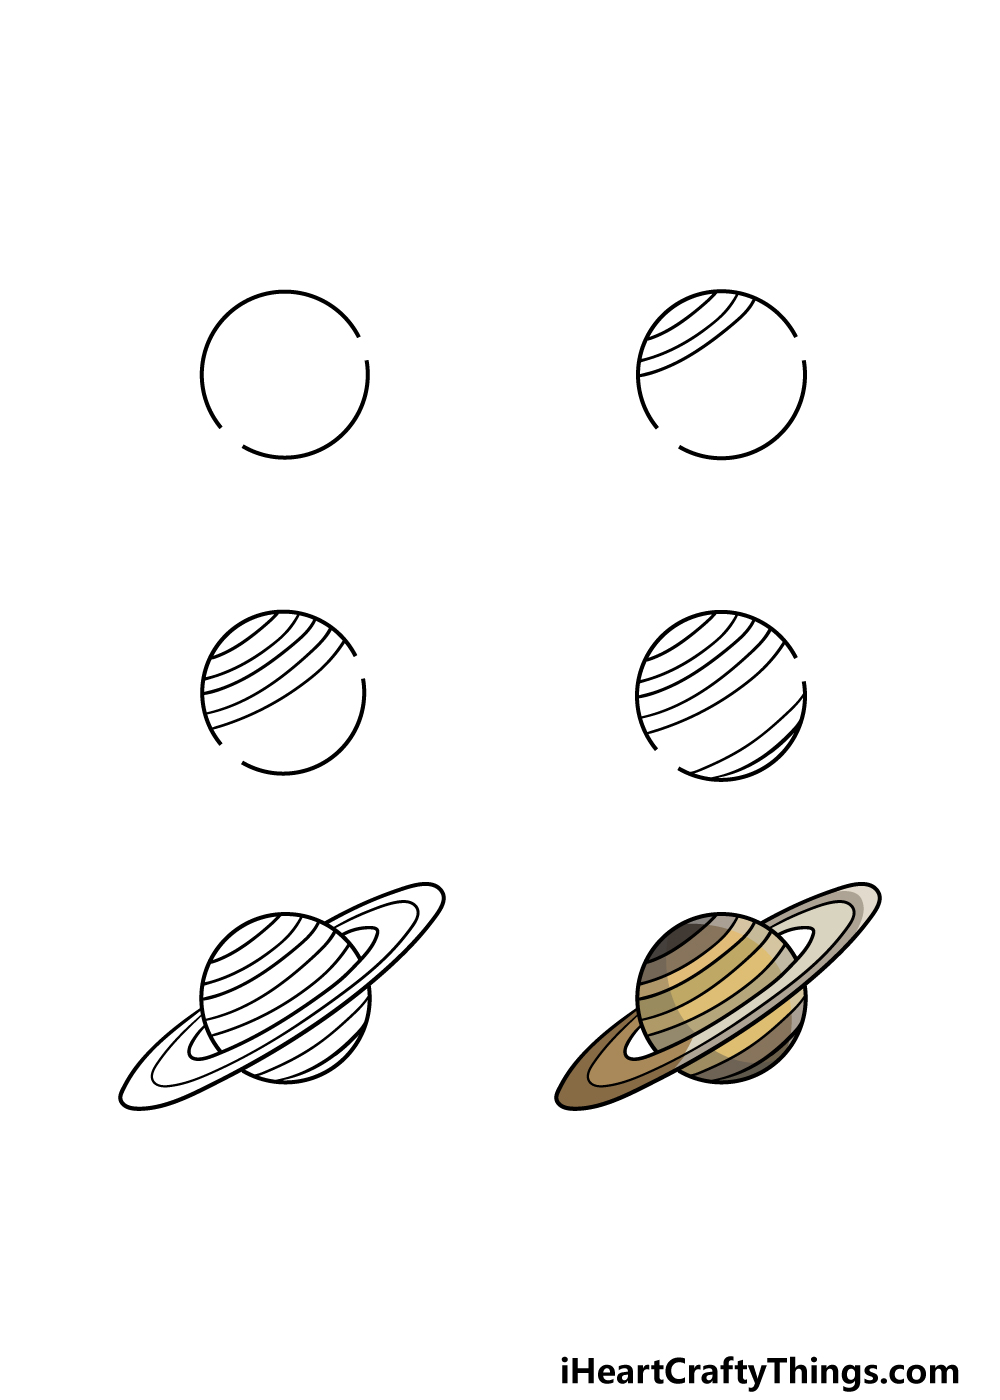
What's in this Blog Post
- How to Draw Saturn – Let's get Started!
- Step 1
- Step 2 – Draw some details for Saturn
- Step 3 – Now, draw some more lines for the planet's surface
- Step 4 – Add the final planet details
- Step 5 – Now, you can draw the ring
- Step 6 – Finish off your Saturn drawing with some color
- Your Saturn Drawing is Complete!
How to Draw Saturn – Let's get Started!
Step 1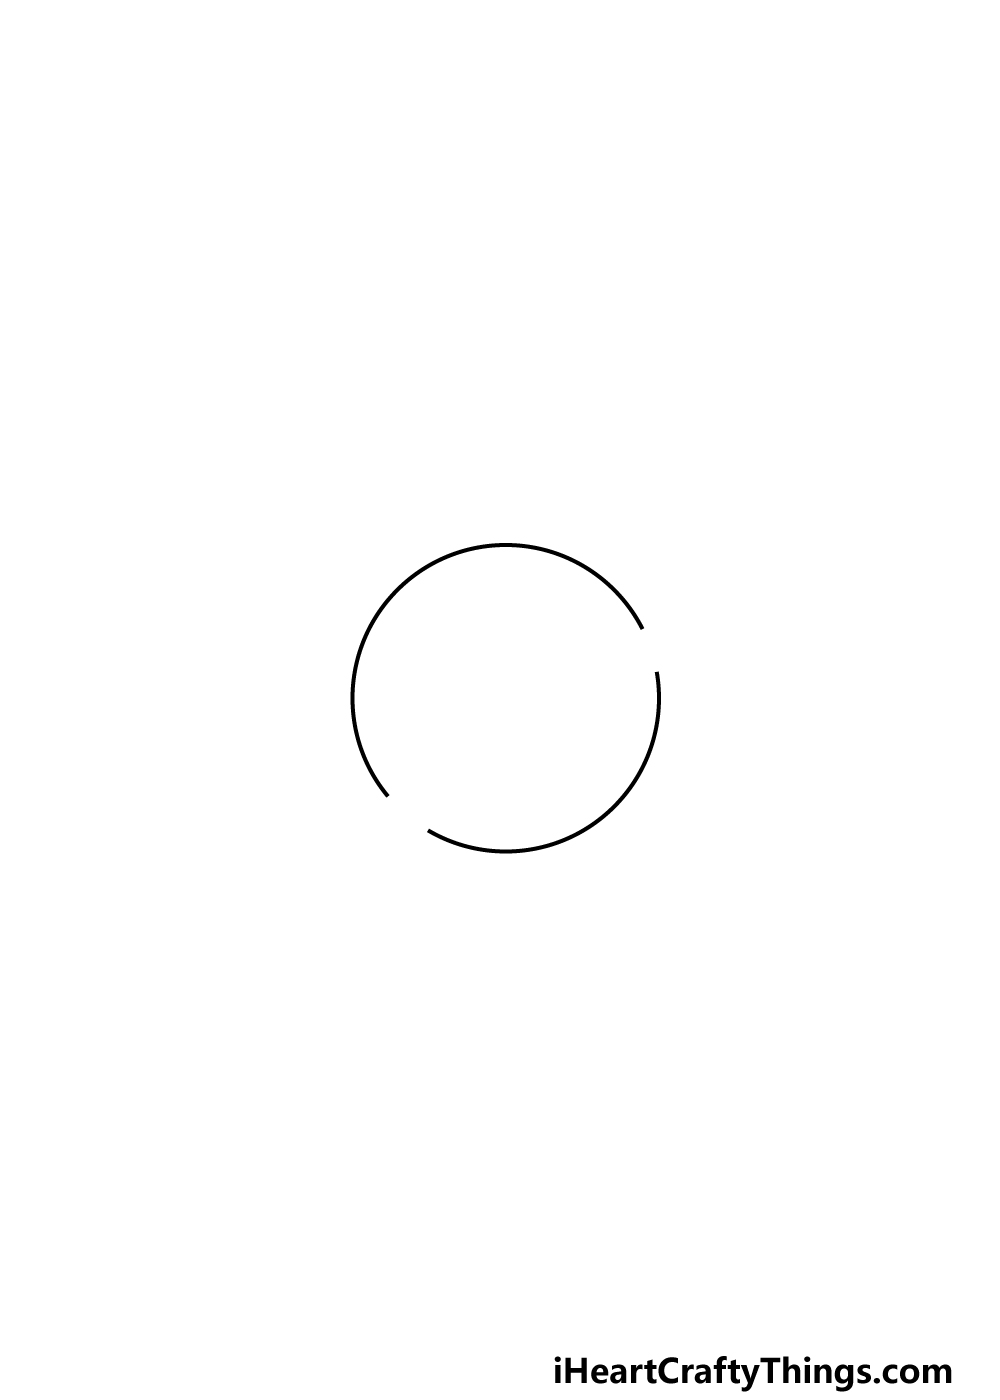
In this first step of our guide on how to draw Saturn, we will be starting with a simple. As you can see in the reference image, it won't be a perfect circle, however.
There will be a small gap left on each side of the circle, and this is where the ring will be going later.
Drawing circles freehand can be a challenge, so to make things easier you can use a drawing tool such as a compass. This simple tool makes it effortless to draw a circle with your pen or pencil. Just remember to leave those spaces if you use a compass, and then you're ready to proceed!
Step 2 – Draw some details for Saturn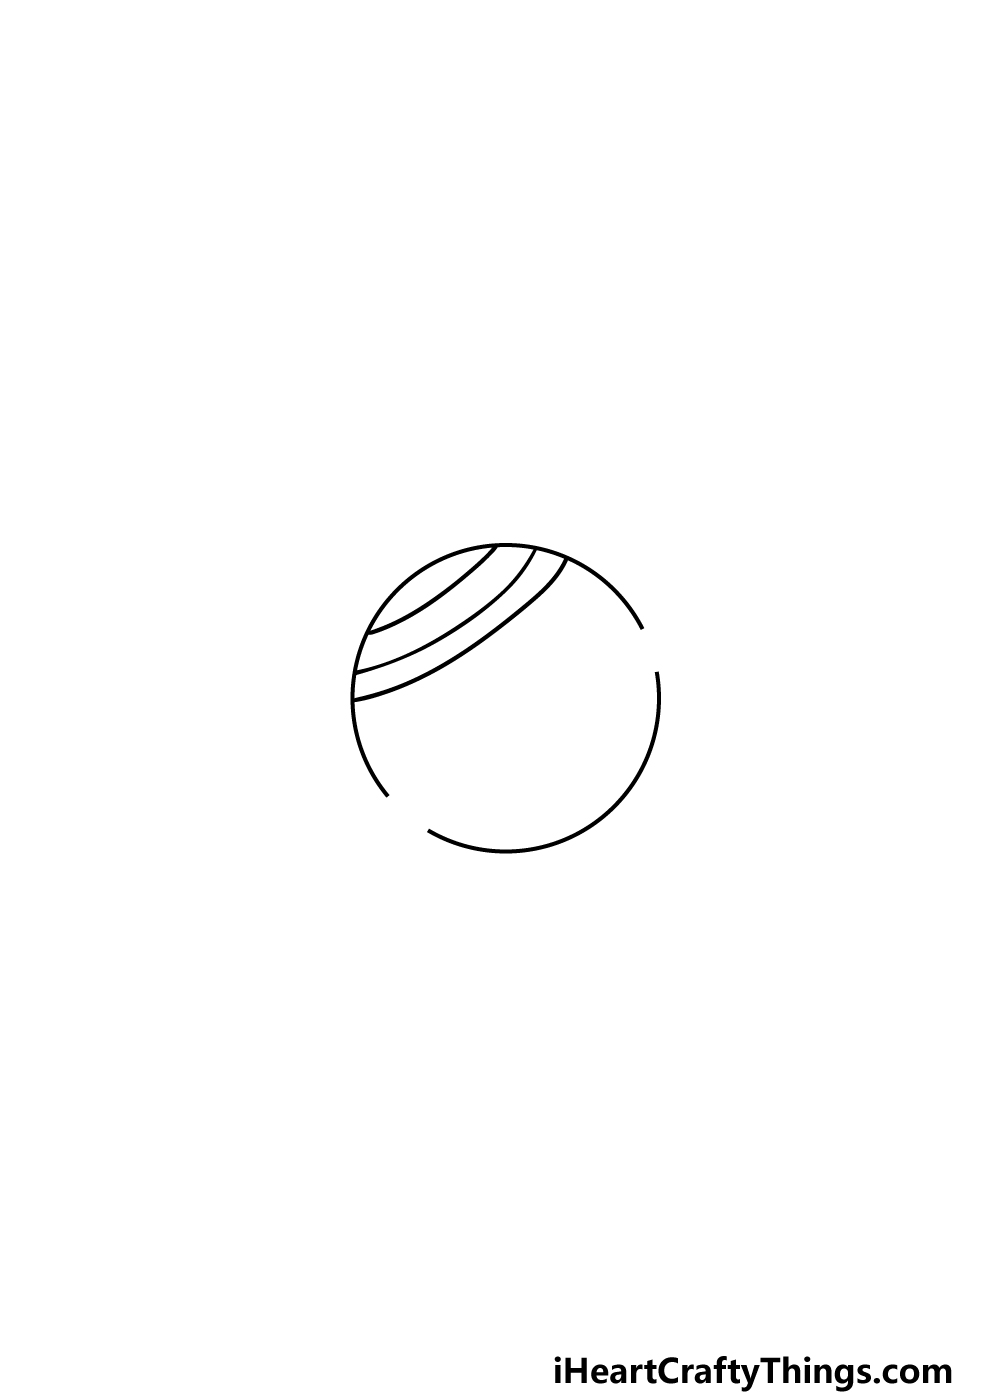
We will be adding some details to the planet for this step of your Saturn drawing. In real life, Saturn is made up primarily of masses of swirling gasses surrounding a presumable solid core, so we will try to replicate this gaseous look for the planet.
You can do this by drawing some curved lines going across the planet's surface, as shown in the reference picture.
We will just be doing the top of the planet for now, but we will add more of these details to it later. Once you're happy with how it looks for now, you're ready to move on to step 3.
Step 3 – Now, draw some more lines for the planet's surface
In this third step of our guide on how to draw Saturn, we will continue adding to the texture of the planet's surface.
To do this, you will simply need to replicate what you did in the previous step and draw some more curved lines over the surface of the planet.
These lines will go beneath the ones that you just drew, and that will take care of the top half of the planet.
Next, we will finish off the rest of the planet's surface and draw the ring in the next few steps, so let's move on!
Step 4 – Add the final planet details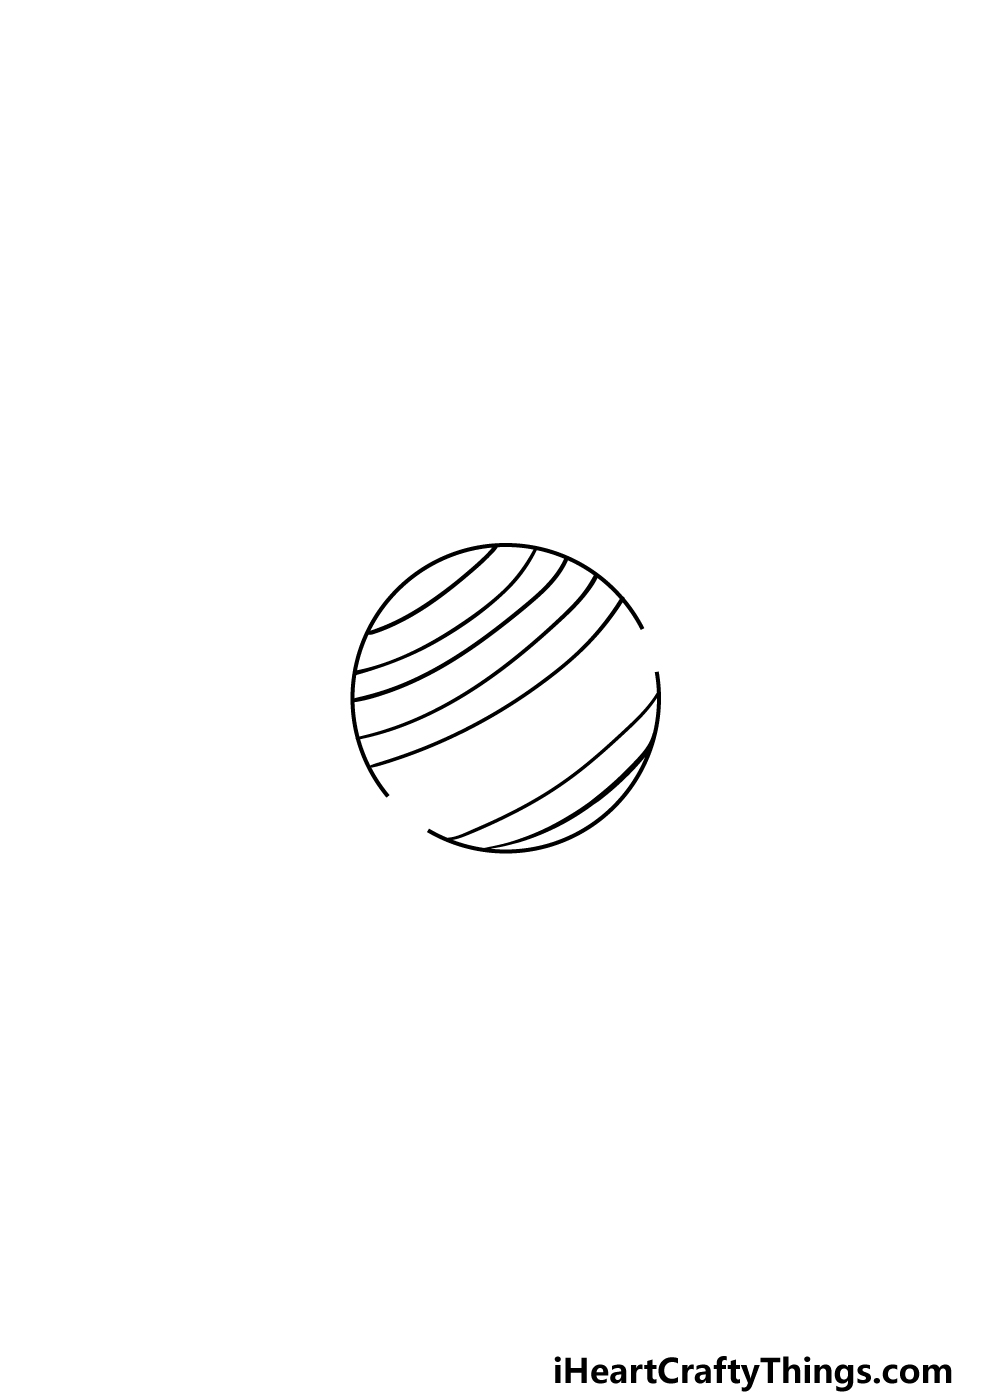
Before we add the famous ring of the planet, we just have a few more detail lines to add in this part of your Saturn drawing.
You have the hang of it now, and for this step you merely need to draw some more of those curved lines you've been adding so far.
These will take care of the details for the bottom half of the planet, and the lines should cover the surface up until the gap where the ring will be going.
Then, it's on to the final details before you start to color in your Saturn drawing.
Step 5 – Now, you can draw the ring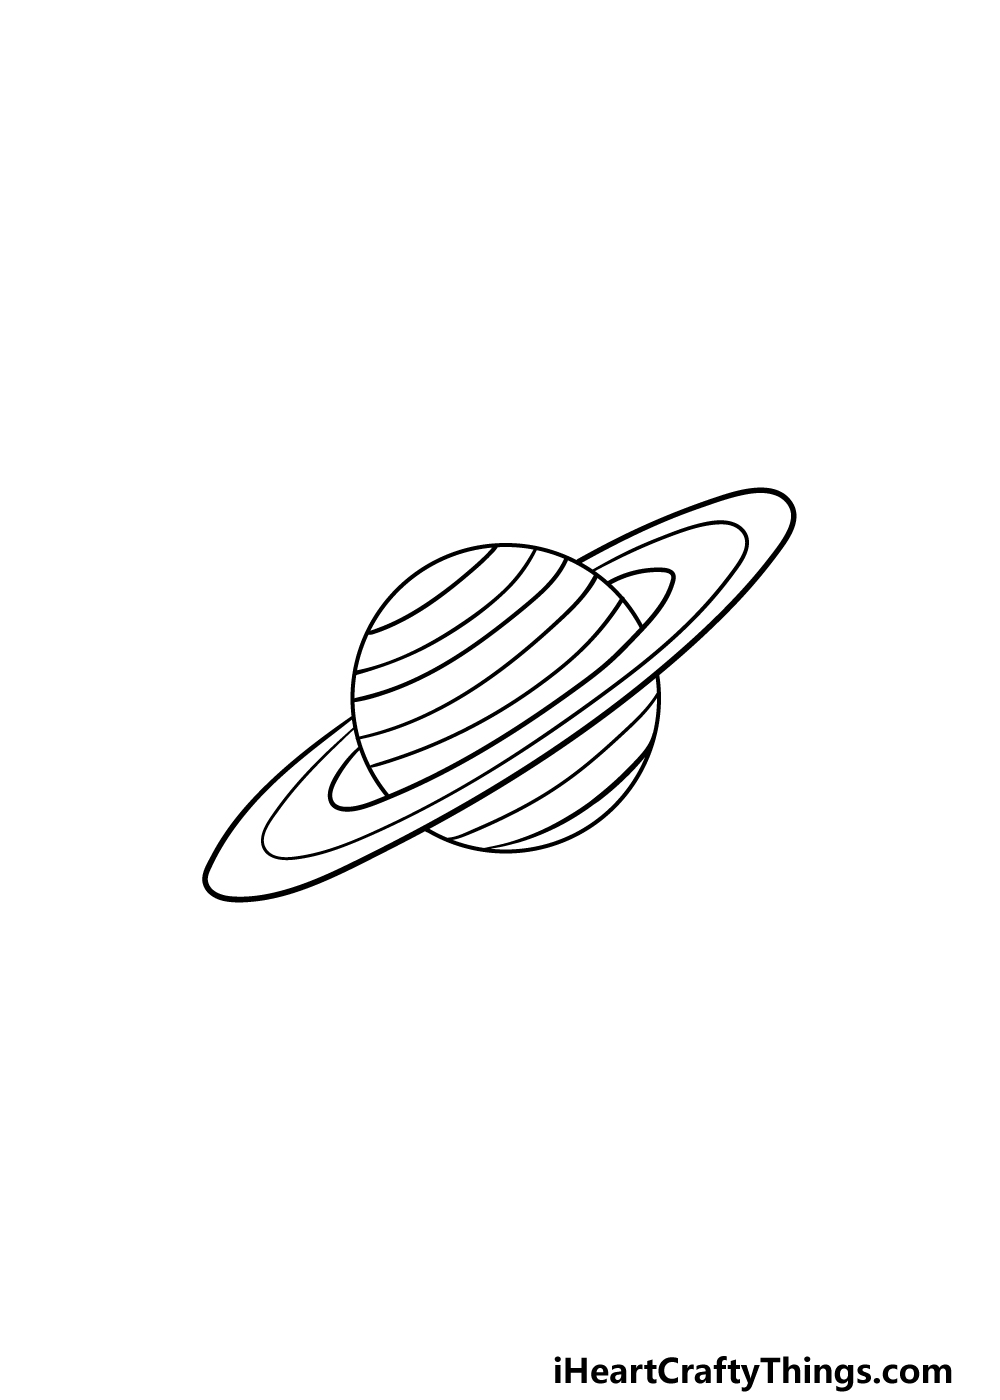
It's time to add the gigantic ring that surrounds the planet in this step of our guide on how to draw Saturn!
To do this, we will be using some long, curved lines going around the planet to form the ring. These lines will also fill in the gaps that you left when drawing the initial circle of the planet.
That will finish off the details in this guide, but before you move on you can also add some details of your own!
These details could be smaller like some stars in the background, but you could also draw the other planets into the picture with Saturn.
You could also add some other creative elements such as flying comets or even a cool alien spaceship whizzing by!
These are just a few ideas, but this is a step where you can really get creative with it. What final details and additions will you add to bring this image to life before the final step?
Step 6 – Finish off your Saturn drawing with some color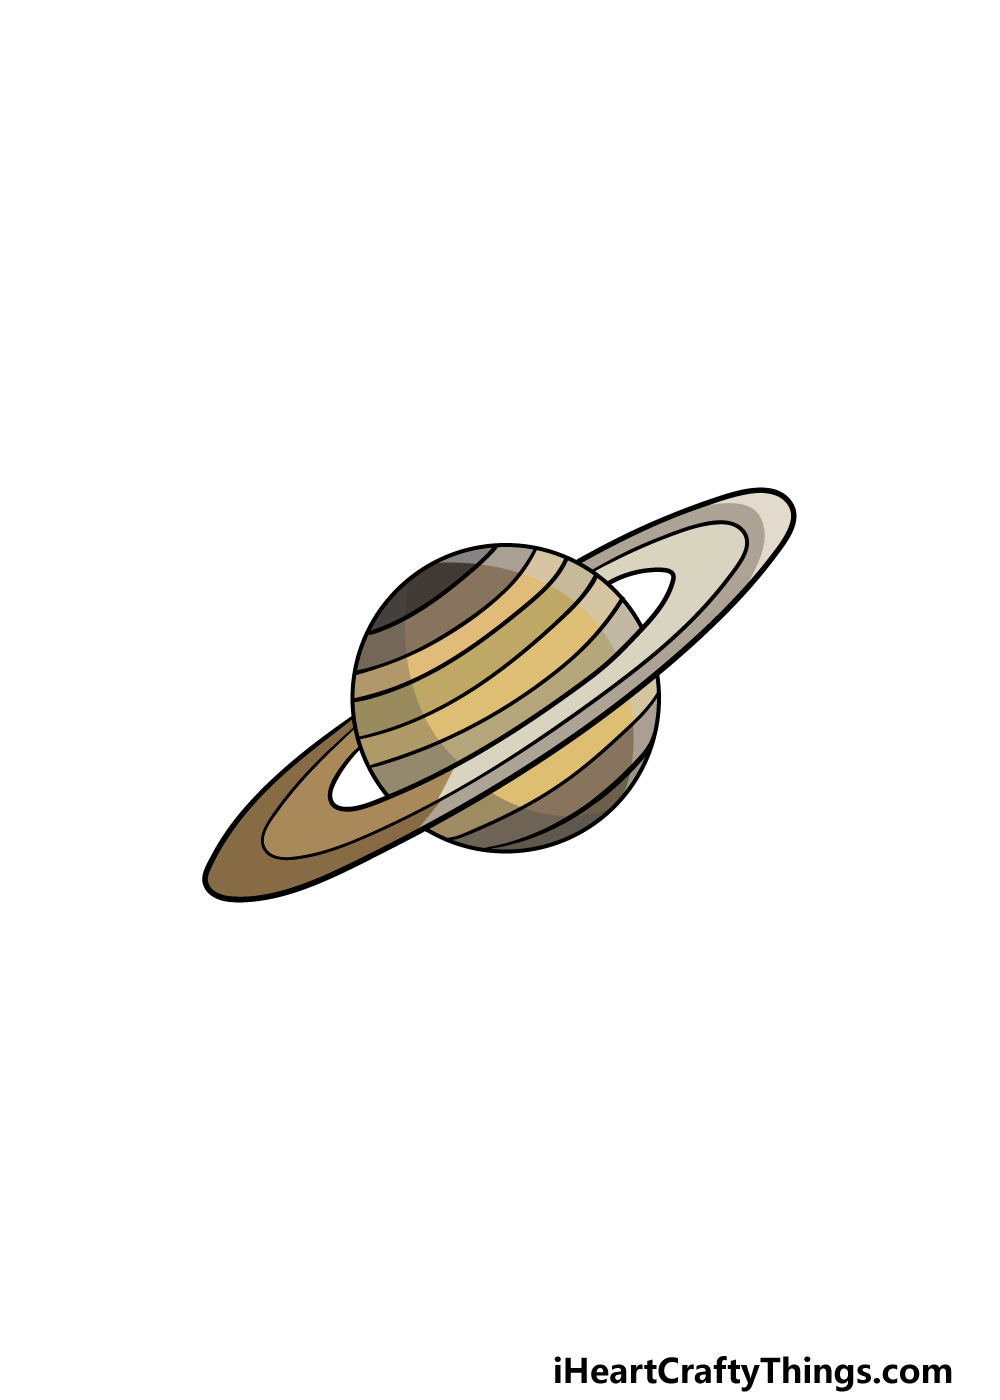
In this final part of your Saturn drawing, you can finish it off by adding some incredible colors to the image. In our reference image, we kept the colors a bit more muted and dark, and you can use this as a guide if you would like a similar color scheme for your picture.
This is your drawing, however, and you should feel free to use any colors that you want for it! You could make the colors bright and bold or even make them a bit darker if you prefer.
Then, you can have fun experimenting with your favorite art mediums! Whether you use mediums to make the colors bright and bold or go for a more subtle and muted look we know that this picture will look amazing.
We can't wait to see how you finish off this picture!
Your Saturn Drawing is Complete!
You have reached the end of this guide on how to draw Saturn, and you should be very proud of your drawing!
By following this guide and taking it step by step you have successfully recreated this incredible gas giant of a planet. We hope that this guide made it not only easier but also more fun to achieve this goal!
Now you can take this drawing even further by adding your own details, elements and color choices. There is a lot that you can do to put your own spin on it, so we can't wait to see what you go for!
Once you have mastered this guide, be sure to visit us on our website for your next drawing guide. We upload new ones frequently, so be sure to visit often!
When your Saturn drawing is finished and colored in, we would love to see it! Please be sure to share your artwork on our Facebook and Pinterest pages for us to admire. We look forward to seeing it!
How to Draw Saturn Step by Step
Source: https://iheartcraftythings.com/saturn-drawing.html
0 Response to "How to Draw Saturn Step by Step"
Post a Comment